

Epson Printer Setup: Explore Advanced Features
Nowadays, Epson printers are a renowned name in the printing world. If you want to print pixel-perfect masterpieces, then the Epson printer is the best choice. So, if you have this printer or want to buy the same, then it is necessary to learn the Epson Printer Setup first. After that, you can easily access its settings and functions to print simple or colorful paper data.
Moreover, for the easy Epson connect printer setup, you can proceed with the three different methods that we discuss later on this page. Additionally, before you begin with the configuration process, ensure that you have a stable internet connection, a computer/laptop and that the Epson printer is connected to the power supply properly.
So, if you are seeking assistance with the Epson printer wifi setup, then must stay focused on this page. Here, you will learn about the methods to configure your printer settings through simple steps. Let’s begin here!


How to setup Epson printer effortlessly?
As discussed above, you can easily configure the printer settings by using three different methods for Windows, iOS, and directly linking to the WiFi through the WPS button. In this section, we will explore all these procedures step-by-step for easy Epson Printer Setup, let’s have a look:
Network Configuration of the Epson Printer
Before we connect the Epson printer to any of the devices, it is necessary to link with your router network first. Here, we share the methods for connecting the touchscreen and without the touchscreen printer to the network.

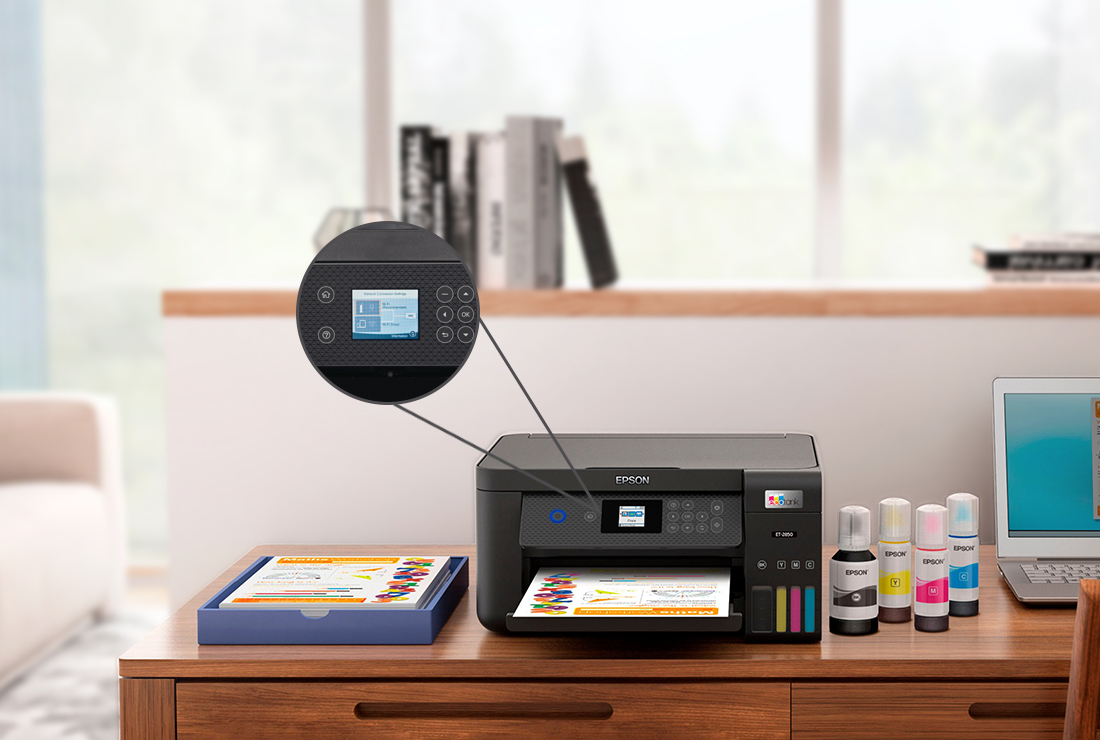
Epson printer wifi setup for using the screen
- Initially, check that your printer is powered on and connected to the stable power supply.
- Now, connect the printer to your home router network wirelessly or using an Ethernet cable.
- For this, tap on the touch screen of the printer and click the Home icon button.
- Next, use the arrow sign to select the WiFi setup option.
- Hereon, click on the WiFi Setup>OK>WiFi Setup Wizard>OK.
- Now, you get the list of available networks on the printer screen.
- Select your router network and enter the admin username and password for that network.
- Finally, tap on OK and your printer will be successfully connected to the router network.
Without touch screen Epson Printer Setup
- First and foremost, ensure sufficient power supply on your Epson printer.
- Next, hold the WPS button on your router till the security lights will turn on.
- After that, release this button.
- Simultaneously, press the WiFi button on the printer till the WiFi indicators flash alternatively.
- Now, wait patiently till the WiFi LEDs turn to a solid state from blinking.
- Hereon, release the button and your screenless Epson printer is successfully linked to the router’s network.
- Finally, you can proceed with the printing papers.
Connecting Epson printer to the Devices
Here, we explain to you the procedures for linking your Epson printing device to the Windows and iOS systems respectively. Let’s start here:

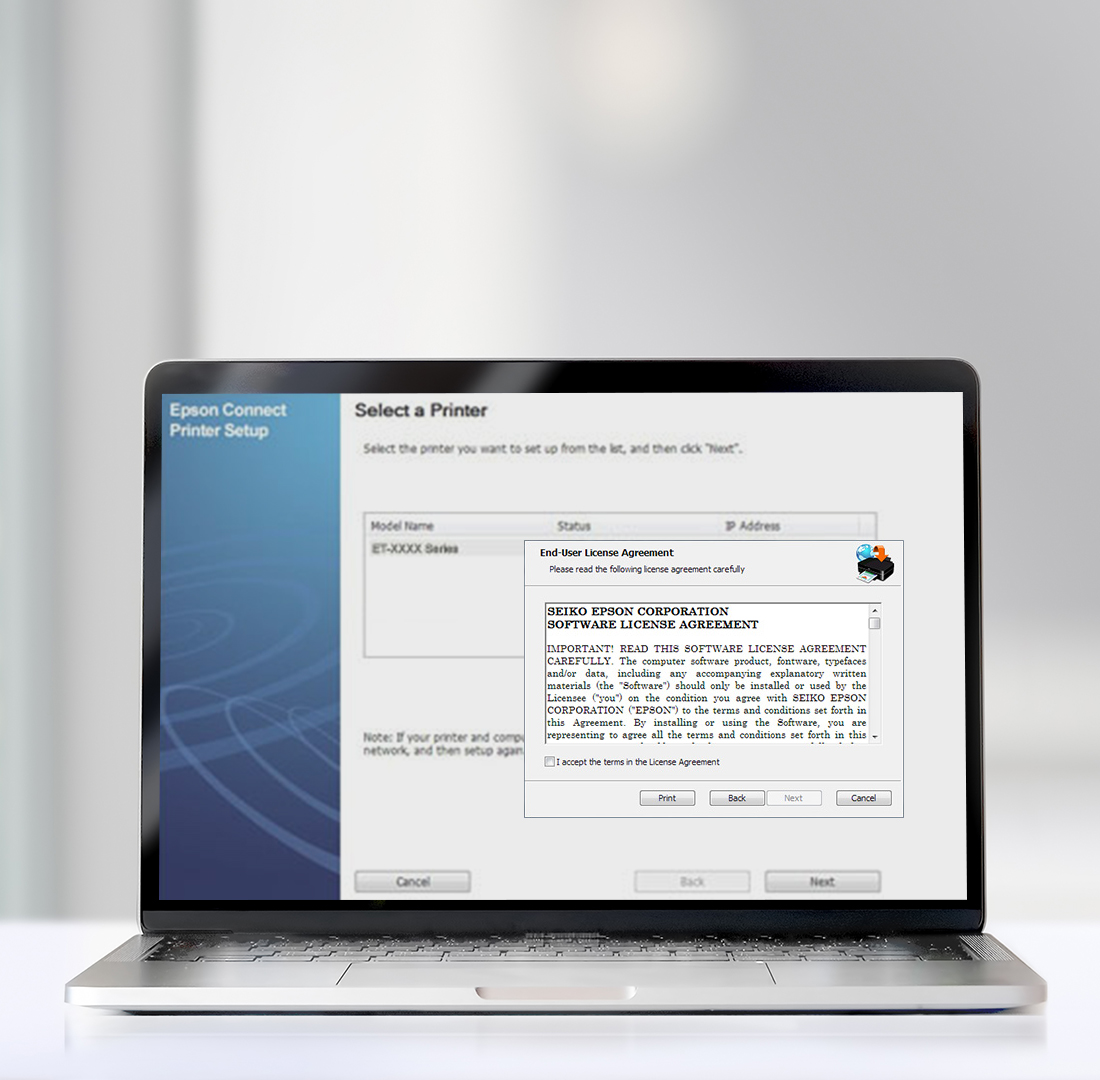
Epson connect printer setup for Windows
- To begin with, download and install the Epson Connect Printer Setup Utility from the official Epson website.
- If you are new to the Epson printer setup, then visit Epson Support and check the Start Here sheet>tap on Manuals> click on Start Here.
- Next, accept the End-User License Agreement and tap on Agree.
- Further, click on OK>Install>Finish.
- Now, you get the details of the Printer models on the window, select your Printer Model here and tap on Next.
- After that, tap on Printer Registration>Next>Agree>Next.
- Hereon, you get the Register a printer to Epson Connect message on the screen.
- Next, click on Next and you get two options to create a new user account, click on the Create an Epson Connect Account form, then tap on Finish.
- Next, if you want to register your new product to an existing account, choose I already have an account, fill in the Add a new printer form, then click Add.
- Finally, tap on the Close option and your printer is ready to work with the Window system.
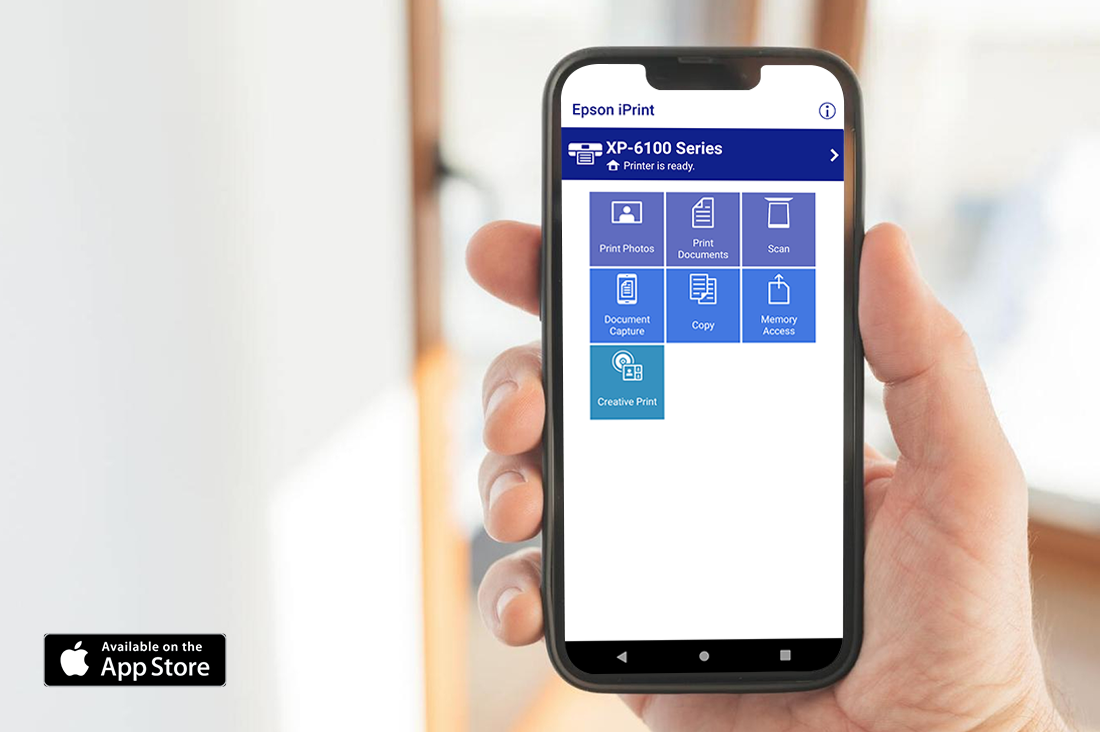
Epson Printer Setup for iOS by using the Epson iPrint App
- Firstly, ensure that your printer and iOS device are connected to the same router network.
- Next, download and install the Epson iPrint app on your smart iOS device.
- You also get the Air print option for the iPhone, iPad, and Macbook.
- Hereon, open the Epson iPrint app and click on Printer is not selected. Tap here to select a printer option.
- Click on Local>Select your printer from the models list.
- Again, tap on Manual IP>Add (Printer’s IP address)>Done.
- Lastly, you are done with the Epson iPrint app setup for your Epson printer.

Need more help with the Epson Printer setup? Get in touch now!
Frequently Asked Questions
Where do I find the IP address of my Epson printer?
Open the control panel of the printer>Settings>Wireless Settings. Print that page to get the Network Configuration of the printer.
Do the Epson printers are compatible with the iOS devices?
Yes, Epson printers are compatible with iOS devices like iPhones, iPads, Macbooks, etc.
Where to find the Epson Connect Printer Setup Utility?
To learn the Epson Connect Printer Setup Utility, go to the official site of Epson, i.e. Epson Support, and go to the Start Here sheet. Follow the guidelines here to find and download the Setup Utility.
How do I setup Epson printer with my Android phone?
To access and configure the Epson Printer on your Android phone, download the Epson iPrinter app or Epson Navi on your smartphone.
What do you understand about Epson Navi?
For easy printer access from your smartphone, the Epson Navi app is the easy-to-process method when you do not use the WiFi router network at home or office.